Introduction
This step-by-step guide helps you prepare a set of written arguments for the independent review panel (IRP).
Writing a strong argument for the independent review panel is one of the most important parts of the exclusion challenge process. Getting a clear, concise, and persuasive set of arguments written down will make it easier to put a case forward in the hearing and allow the panelists time to review and understand your position before they make their decision.
Putting together your best case starts with identifying the legal issues. Here, the School Exclusions Hub will help you to do that by asking you a series of questions about the exclusion and by providing you with suggested wording documents, which provide a proposed wording for arguments covering a range of circumstances to fit your case.
Alternatively, if you don’t want to use this resource to identify the issues and already know which suggested wording documents you wish to use, each one is included in the Resource Library.
Once you have all the Suggested Wording documents you want to use, you can copy and paste your completed arguments into the Template Document: Submissions for the independent review panel
For more information on the law and practice of the independent review panels, see the Quick Guide: Independent review panels
Once you have downloaded the Template Document, click "Begin" to start the guide, or read below for instructions on how to make use of this guide and the resources it contains.
How to use this guide
1. Open the submissions
The "submissions" that you can download above is the document that will bring all your arguments together into one place in a format that is presentable for the panel.
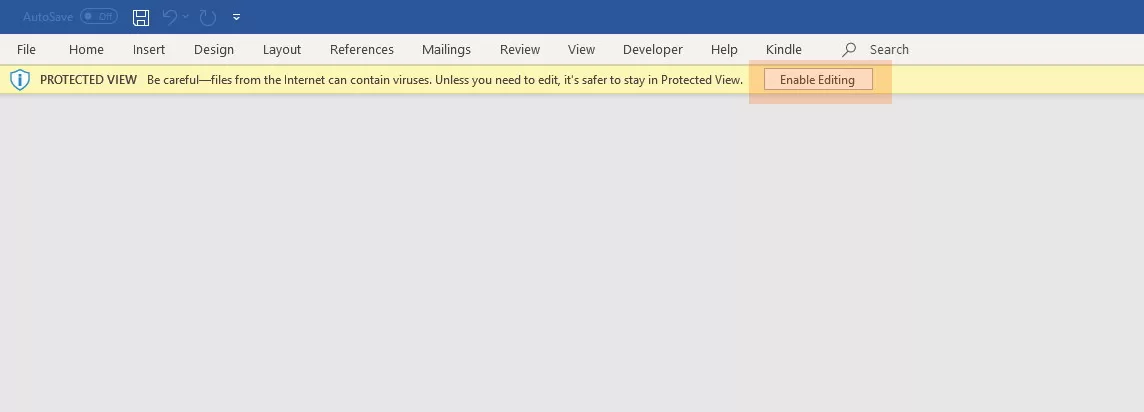
Download the Template Document, open it and click "enable editing".
2. Fill in the basic details
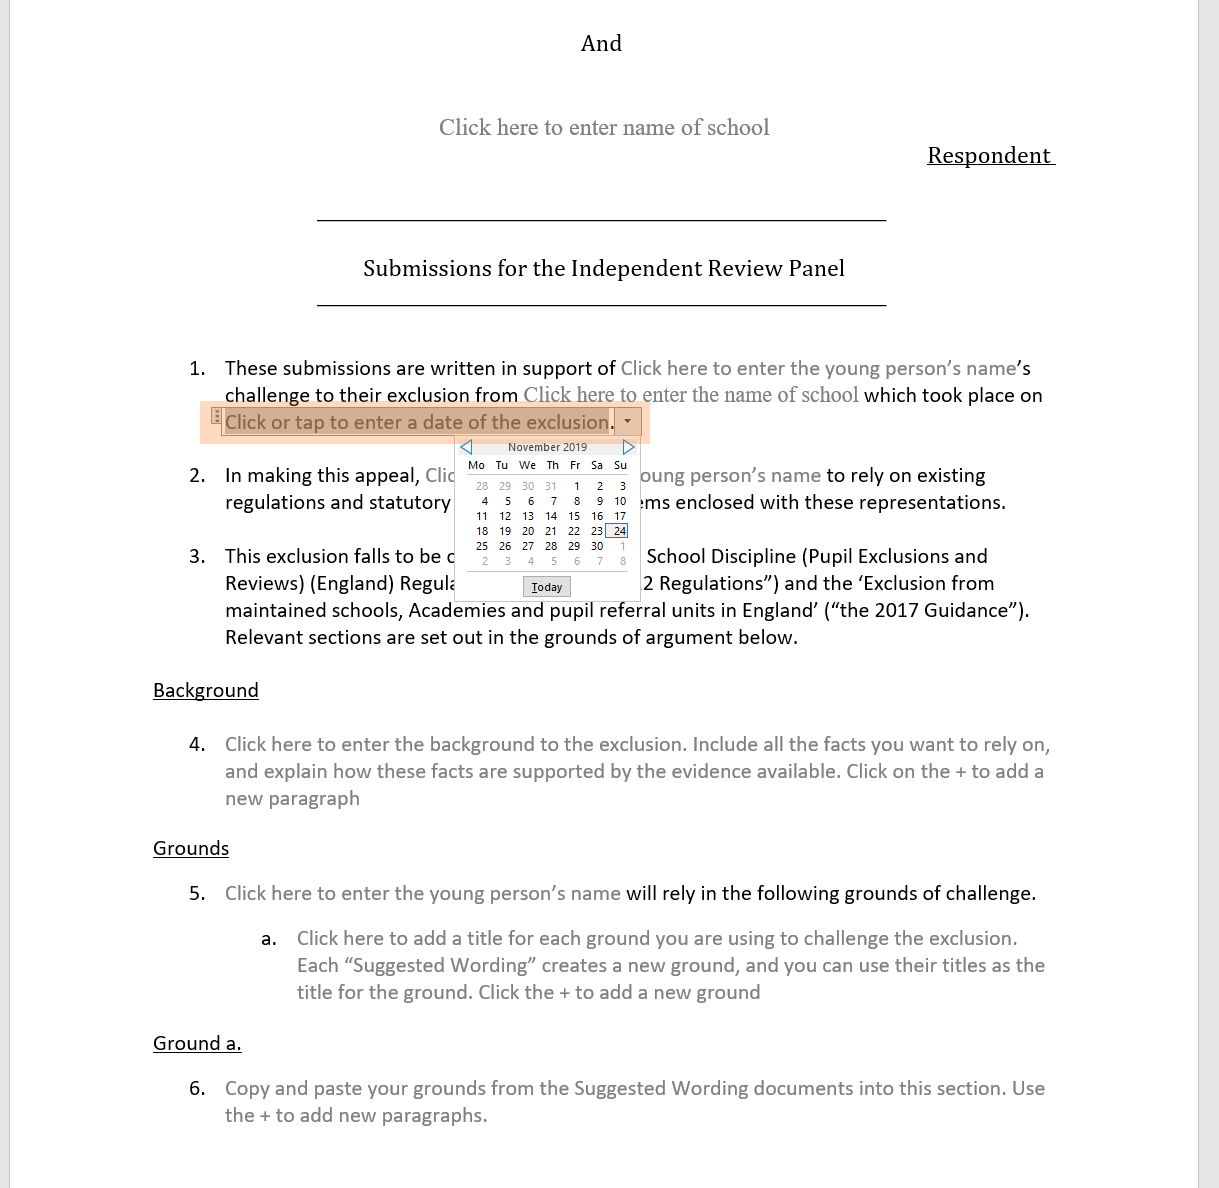
You will need to add the young person's full name and the name of the school at the header of the document, and then the young person's first name in the body. These will auto-fill other places where the same details are required.

Use the drop-down arrow to select the date of the exclusion, or type it in if you prefer.
3. Add the background
The background of the case includes a summary of the relevant events. Critically, this is an opportunity for you to set out what the young person says happened and, where that differs from the school's account, refer to any evidence that supports the young person's version of events.
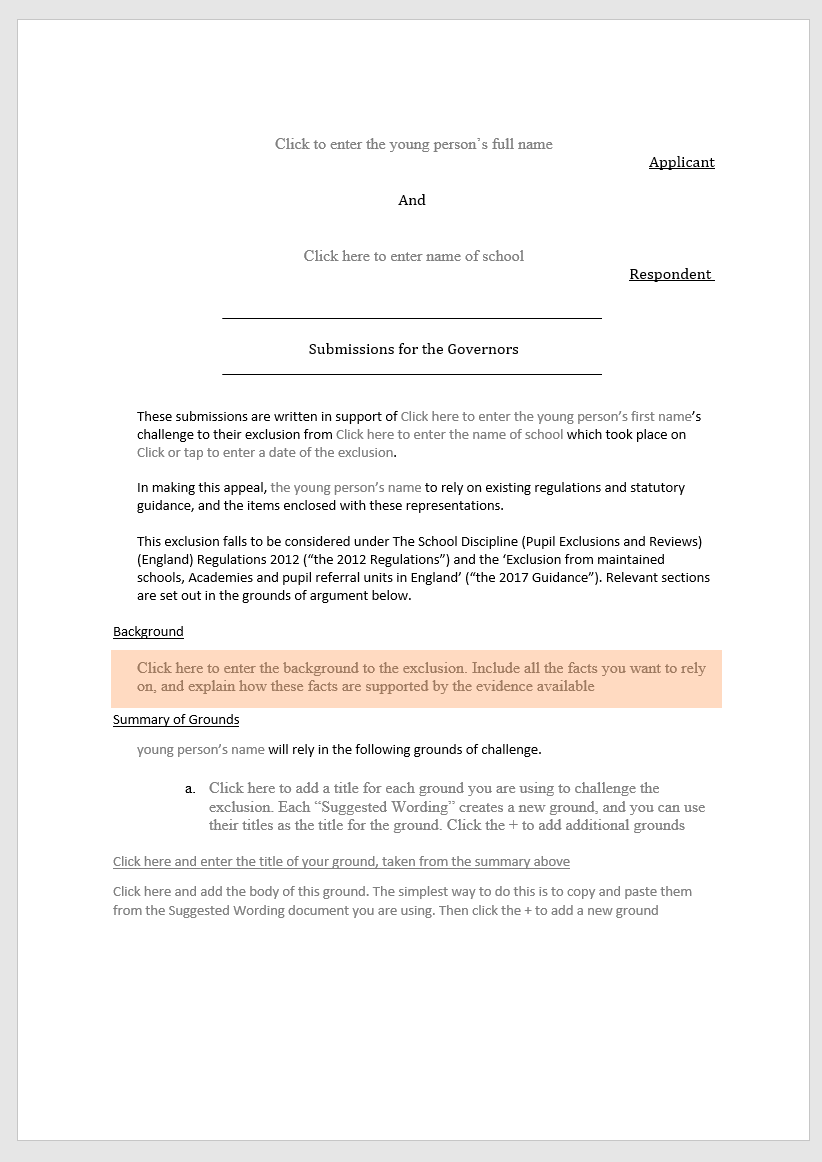
Once you have written the background, make sure it:
- Clearly explains the events as the young person describes them;
- Highlights where the family disagrees with the school's version of events;
- Refers to any evidence that supports the family's version of events;
- Does not discuss legal questions such as whether the tests in the guidance are met. This will confuse matters. Your submissions will be most effective if you set out the background first and then go on to discuss your legal arguments separately.
4. Begin the guide
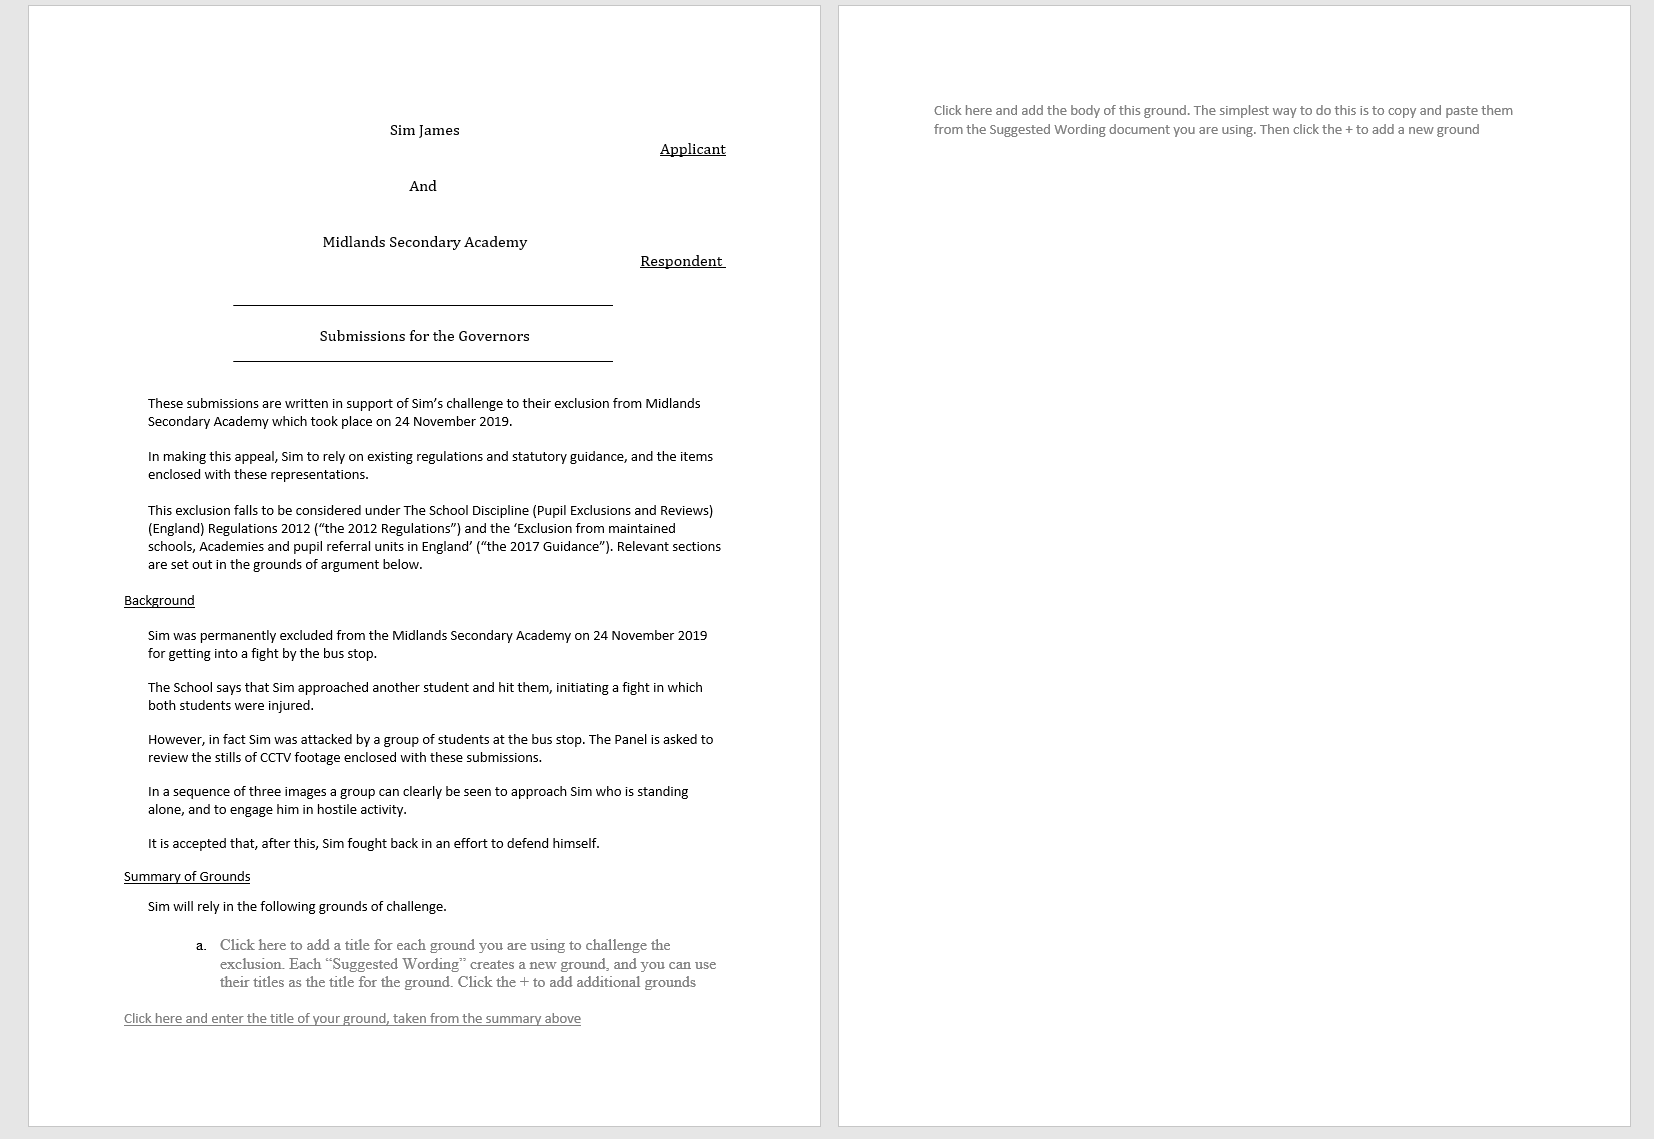
You should now have a document that looks something like the one below.
5. Complete the Guide
The guide will take you through a series of pages, each of which asks you a question. Each page provides information and guidance to help you answer the question. Once you have answered it, you will be presented with a "yes" button and a "no" button. Your answer will determine which question the guide takes you to next. Some pages simply have a "continue" button. In these cases, the answer does not determine the next relevant page, so click this button once you have answered the question.
Most pages will present you with a suggested wording document, which you can download if your answer to the question indicates that it is relevant.
If the answer to the question results in a recommendation that you download the document, download it before moving on to the next step.
Once you have completed the guide, you should have a collection of documents with suggested wording. These will provide proposed arguments that are relevant to the young person you are supporting.
6. Complete the Suggested Wording documents
The documents you will have downloaded through the guide each contain a set of paragraphs that suggest wording for a legal argument in relation to the exclusion.
Once you have chosen the most appropriate paragraphs and removed the highlighting, you will see that the documents include prompts for further information, much like in the template submission document. These prompts appear in grey text and describe the information you are required to input. Simply click on the text and start typing to complete it with the required information.

Sometimes they will appear with a drop-down menu from which you can choose multiple options.

Once you have completed all the required information, you can delete the text boxes and you will be left with a complete argument to copy into your submissions.
7. Provide titles to each of your arguments
Your arguments will be easiest to follow when they are split up and clearly labelled with a headteacher that summarises what it is you are asking the panel to conclude.
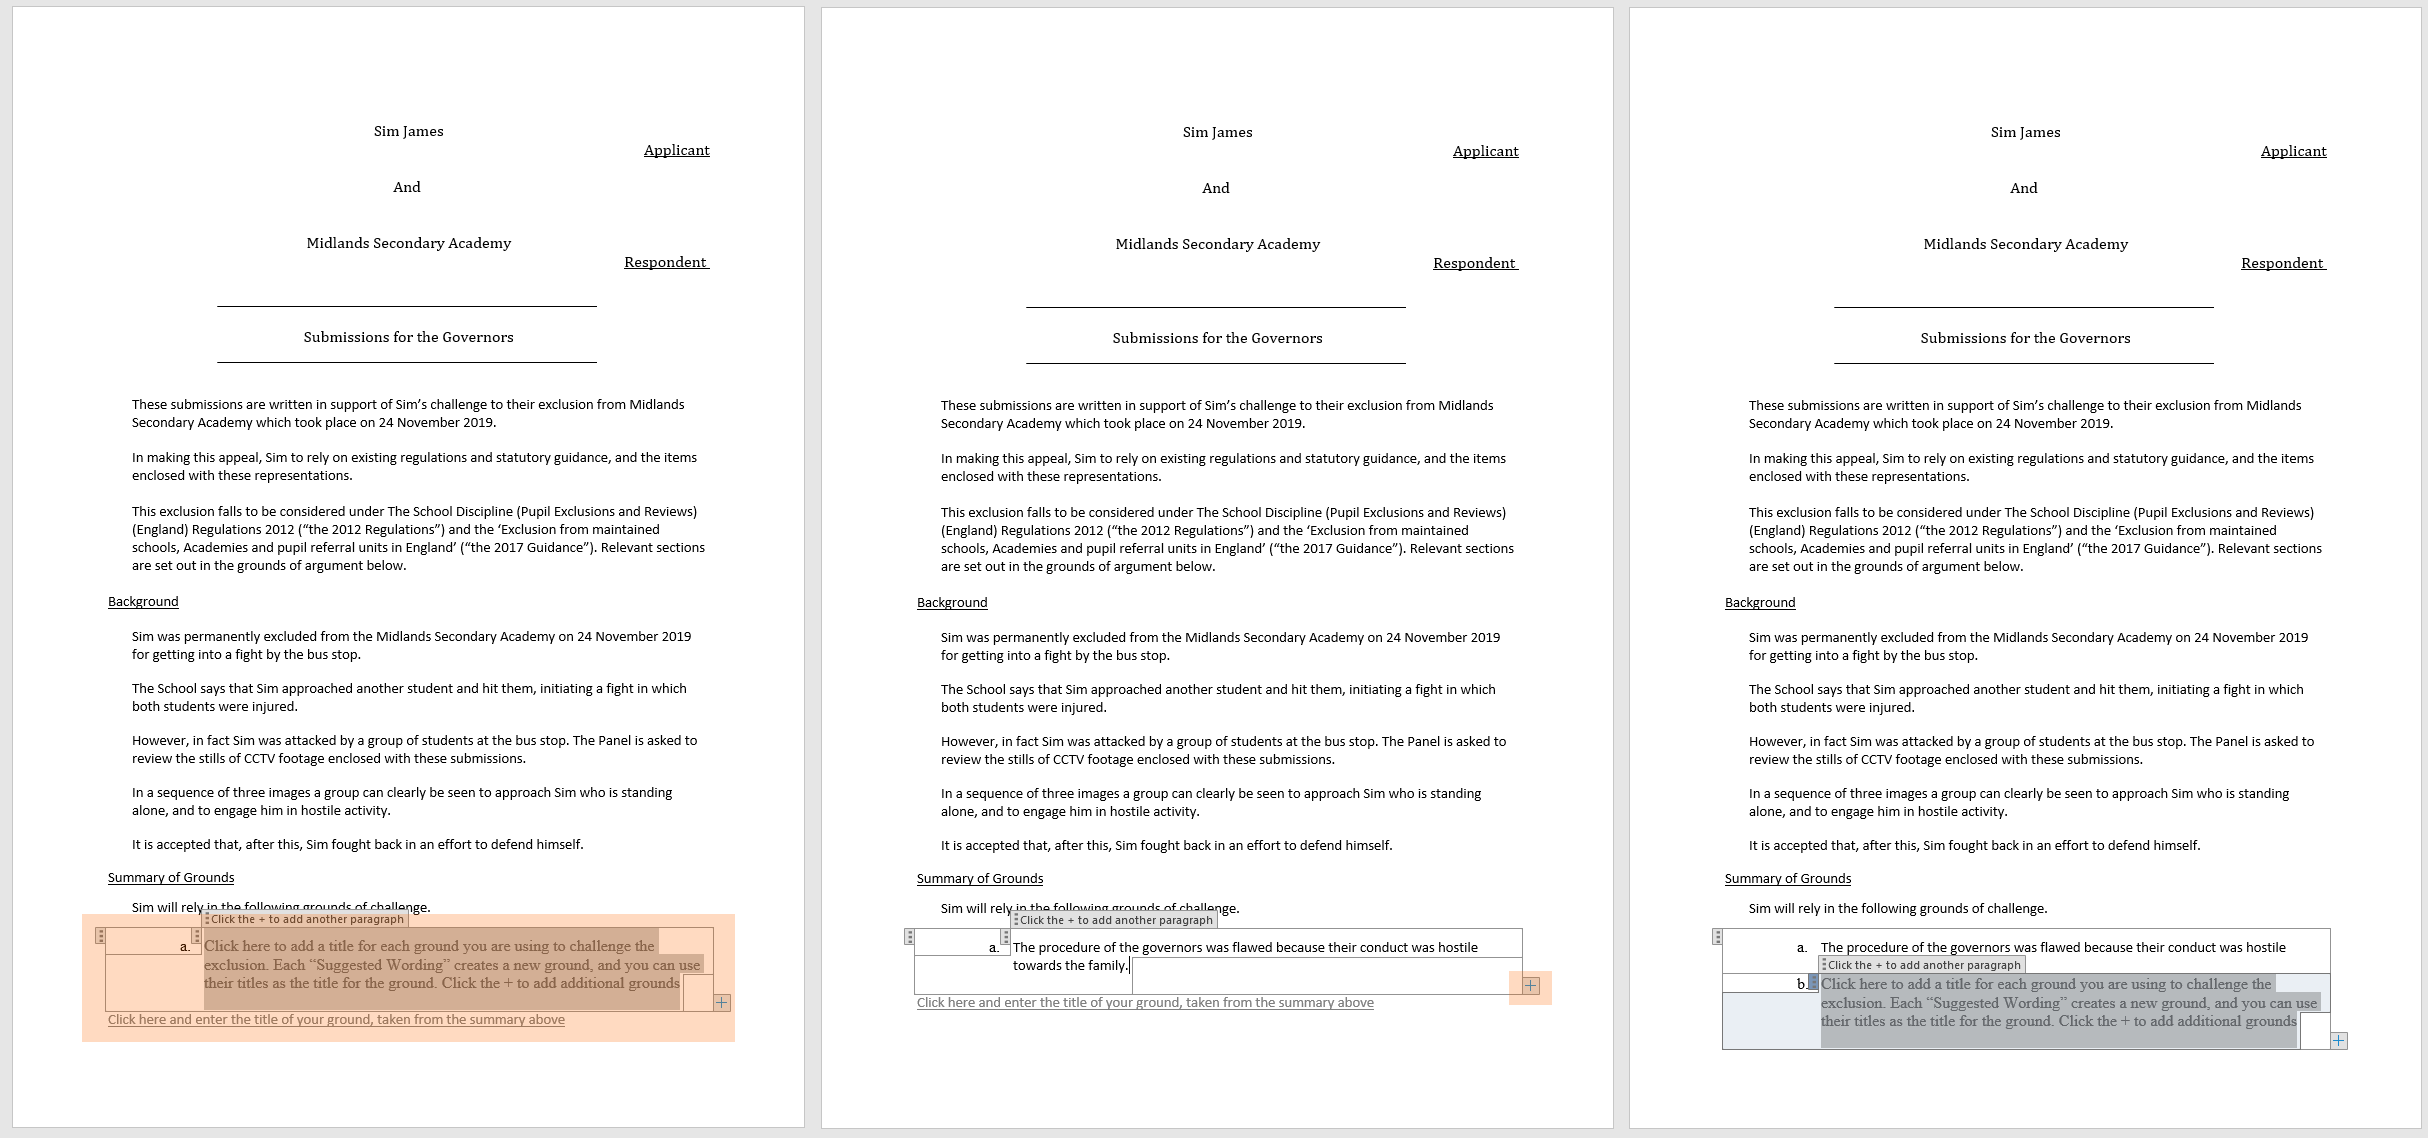
Switch back to your submissions and look at the section marked "grounds of challenge". Click on the grey text after the "a." and enter the first title. You can adapt the title of the suggested wording document you are using as the title of the argument.
Once you have added a title, you can click the + icon at the bottom right of the box to add another.
8. Copy and paste your arguments
Once you have added the titles of each argument, you can start adding in the body of each one in turn. Add the title of your first argument by clicking on the box underneath the summary of the grounds and typing it in or copying and pasting it in. The title should be the same as it appears in the list summarising each argument, and they should appear in the same order.
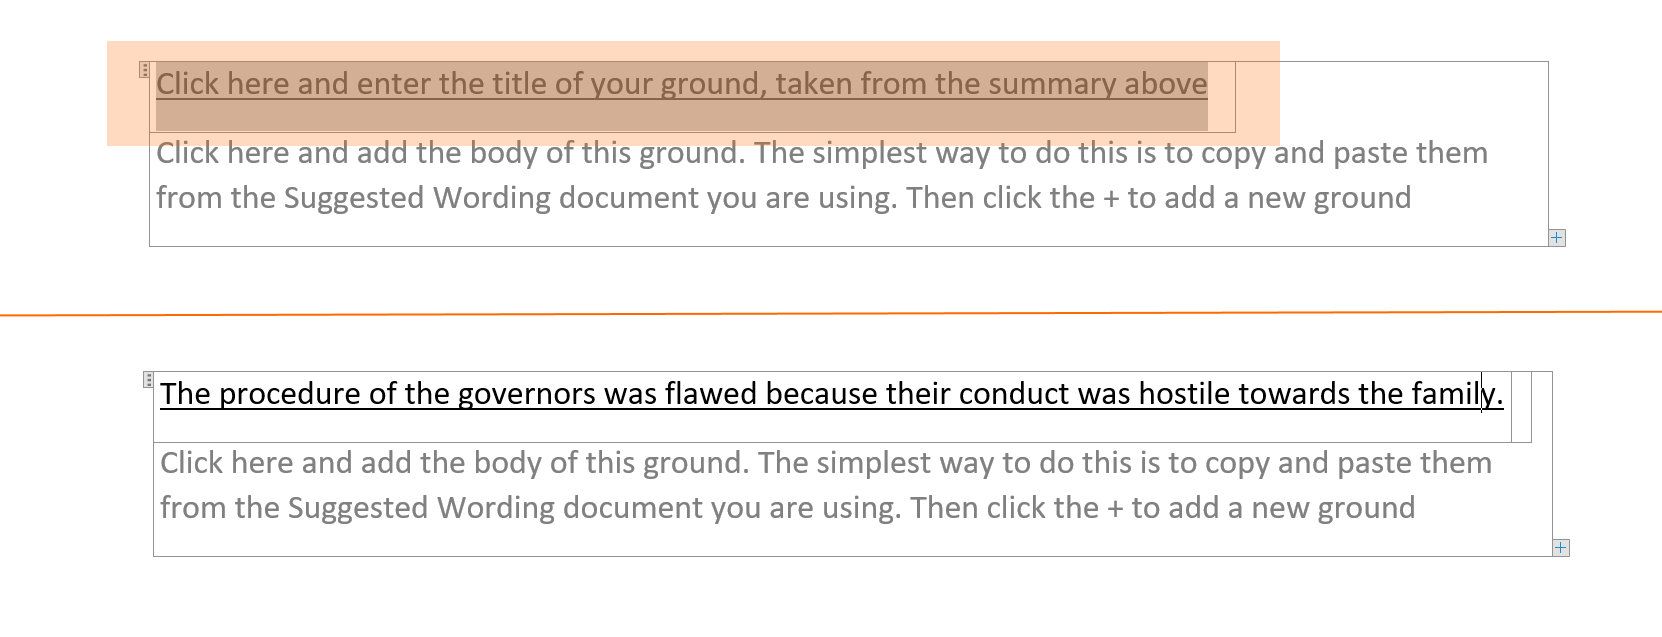
Once you have added the title for your first argument, add the body by copying and pasting it from the suggested wording document.
Then click the + icon at the bottom right of the box to add a second argument, and continue this process until all the arguments from your suggested wording documents are added.
9. Check and tidy the document
We want to make this process as comprehensive and smooth as possible. However, this guide cannot cover every situation. Given the complexity of the process, it is inevitable that your finished submissions will need to be reviewed to make sure that they read properly. You may need to amend the wording to avoid repetition, ensure everything is clear, and ensure nothing has been missed. You may also want to smooth out the formatting.

